How to setup Wireguard VPN on Ubuntu Server 22.04
WireGuard® is an extremely simple yet fast and modern VPN that utilizes state-of-the-art cryptography. It aims to be faster, simpler, leaner, and more useful than IPsec, while avoiding the massive headache. It intends to be considerably more performant than OpenVPN. — wireguard.com
After toying with it for a while I must say that it is fast, it is simple and it sure is more performant than OpenVPN. By far.
Major difference for casual users would be the fact that WireGuard is self hosted, while you usually subscribe to a OpenVPN service.
It’s easy though, instructions bellow.
Setting up the server
I personally use Hetzner as it’s quite affordable and very easy to use. I use their cheapest package, 1 CPU core and 2GB of RAM — package which costs mere 3.49 EUR / month. That’s quite enough for crazy efficient WireGuard.

Select Ubuntu 22.04, which is latest LTS release and it will be easy to configure.
Once the VPS is configured, find it’s IP address and SSH into it. How to SSH is beyond the scope of this guide.
After the server is booted, update and upgrade and install the WireGuard package. Reboot the server after all packages are installed.
apt update && apt upgrade && apt install wireguardSetting up the WireGuard server
While WireGuard is easy to setup manually, to save time a script can be used. I recommend the following script found on Github.
In essence, you type the following into the console:
wget https://git.io/wireguard -O wireguard-install.sh && bash wireguard-install.sh
You will first be asked which port should the WireGuard listen at, press enter to confirm the default choice.
Set the name for the client, for example “phone1”.
Select the DNS server for the setup, I tend to use Cloudfare (1.1.1.1).
QR code like this will pop up, you’re all done.

Mobile client
I must recommend “Wireguard” Android app found in the F-Droid repo. It can scan the QR code so setup takes mere seconds.
I very much prefer using Wireguard over OpenVPN on the mobile device as it’s much lighter on the CPU and thus on the battery life.
Desktop client(s)
This will of course depend on the OS you use at your desktop machine or the workstation. I personally use Debian at my workstation so setup for me was basically: 1) install the wireguard package, copy the client.conf file from the output of that script on the server and place it in in /etc/wireguard/wg0.conf. After that Wireguard is launched with a simple command: wg-quick up wg0.
You can check out the stat of a tunnel with the following command:
sudo wg showYou can also use the following plugin for Network-Manager, which almost certainly comes with your desktop Linux distribution.
Before you move to compile it pull a couple of dependencies first.
sudo apt install wireguard git dh-autoreconf libglib2.0-dev intltool build-essential libgtk-3-dev libnma-dev libsecret-1-dev network-manager-dev resolvconfNow compile and install:
git clone https://github.com/max-moser/network-manager-wireguard
cd network-manager-wireguard
./autogen.sh --without-libnm-glib
./configure --without-libnm-glib --prefix=/usr --sysconfdir=/etc --libdir=/usr/lib/x86_64-linux-gnu --libexecdir=/usr/lib/NetworkManager --localstatedir=/var
make
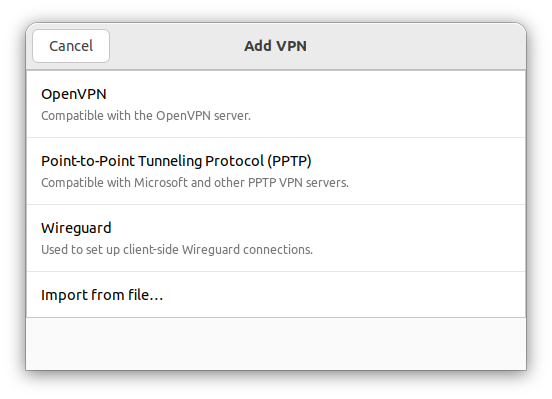
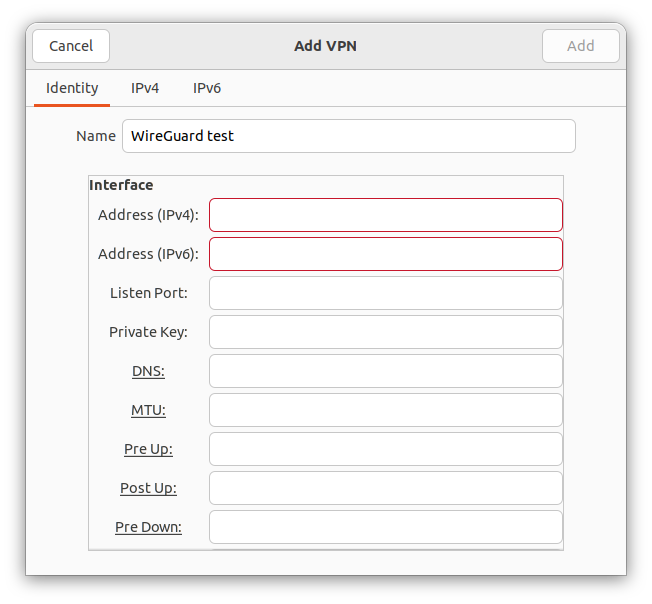
sudo make installNow your network setup will get a new option, to setup a WireGuard connection.
That’s it, enjoy.